In order to pass my five-point wellness clinic blog assessment, each post must include a byline and bio. Let’s look at why bylines and bios are so important, and how to make yours more effective.
What is a blog byline?
Depending on the design (theme) and settings of your blog, there are several details that may appear below the title of every post, usually in smaller print. Most common are the date and the author’s name. The post’s category and tag(s) may also appear here and/or in the footer at the bottom of the post. If you or your admin person log in to your site via a generic admin account (and if so, here’s why you should change your WordPress login username immediately), your blog post will appear to have been written by someone named “admin.” Consider how much better it looks to have an actual name here, as you can see on the Cleveland Clinic Health Essentials blog:

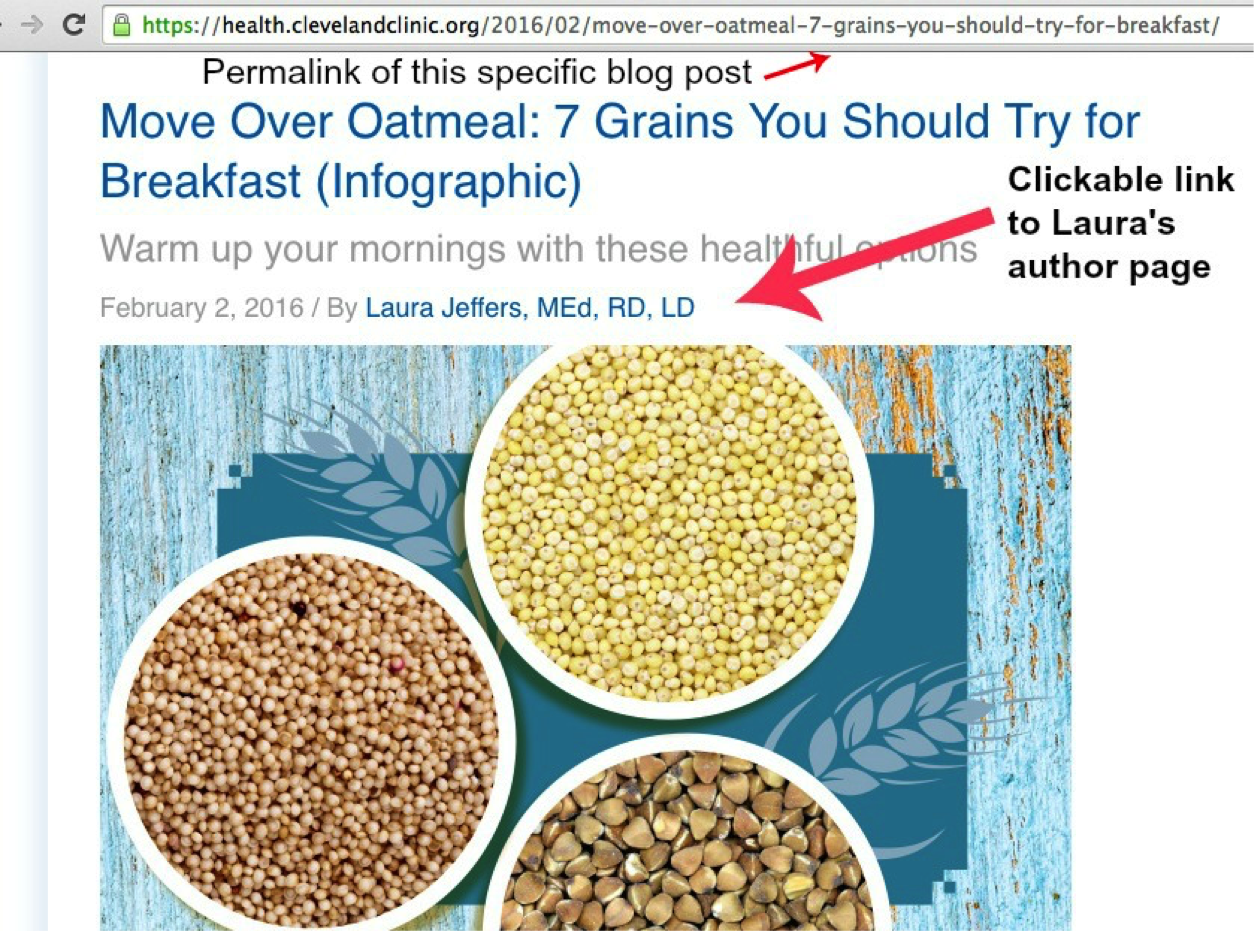
Laura Jeffers post at Cleveland Clinic Health Essentials blog
On many sites including Content Mastery Guide, clicking on the author page opens an archive of all posts assigned to that author’s name, but look at the Laura Jeffers author page to see what’s possible with a little more customization:

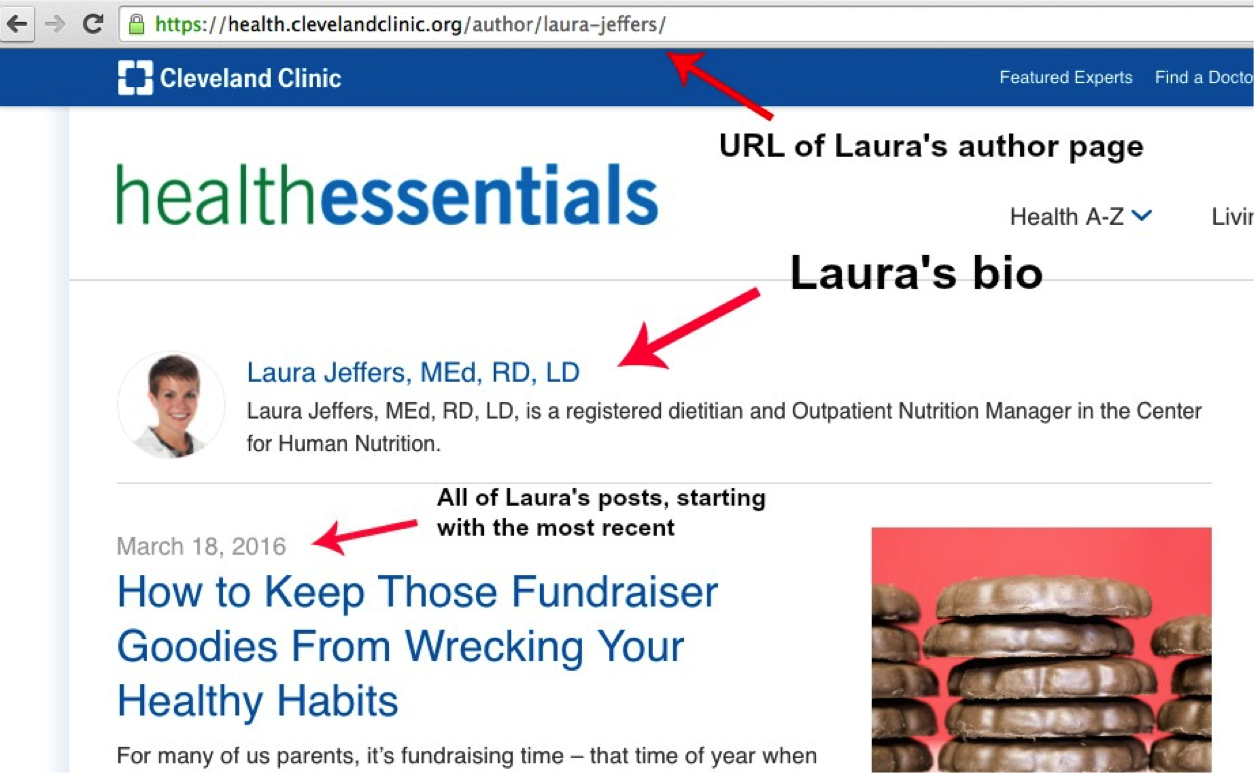
Laura Jeffers author page at Cleveland Clinic Health Essentials blog
The benefits of having an author byline
For your readers: Seeing a name helps them make a personal connection and see who is actually behind that blog post. One blogger noticed a 50% increase in reader responses after moving his byline to a more prominent spot at the top of each post. For your team: Who doesn’t like to see their name in print? When team members’ names appear in their post bylines, they’ll feel prouder of their work and more likely to share their posts with their network.
More Read


We already have an About Us page, why does each post need a author bio?
Quite simply, this blog post may be the only page the reader ever sees – at least on this visit. If they like what they see, they may stick around to read something else or learn more about your clinic, but chances are you only have their attention for a short time. As well, the bio helps establish or reinforce the author’s credibility and expertise. It gives the reader more trust and confidence to follow any advice suggested in the article. Here is the bio at the bottom of one of Laura’s posts at the Cleveland Clinic Health Essentials blog:

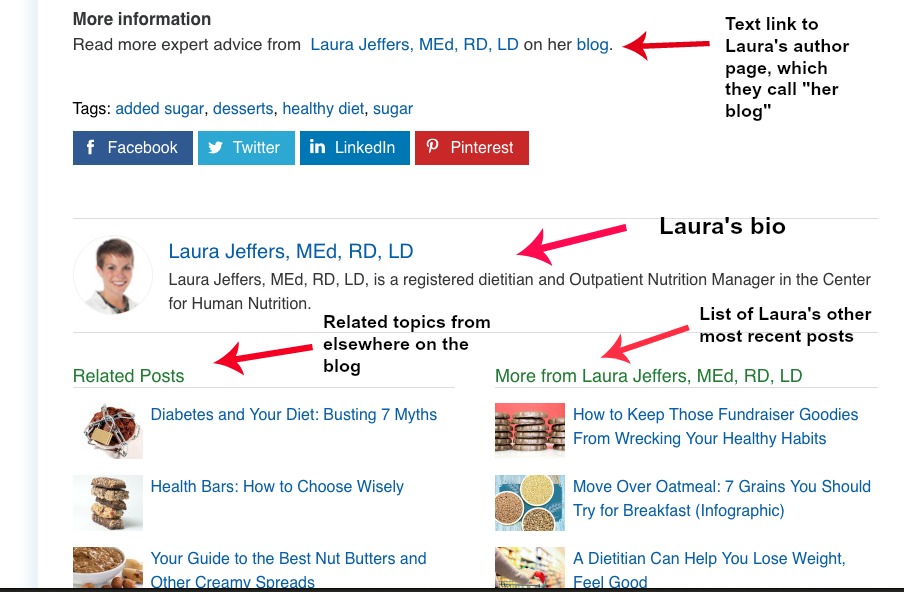
Cleveland Clinic Laura Jeffers bottom bio at Cleveland Clinic Health Essentials blog
5 tips for better blog bylines and bios
Work with your website developer or admin person to implement these changes on your site. If you need help, I recommend WPBlogsites. 1. Review your blog’s settings Work with your website developer and/or theme settings to determine how bylines and bios will be displayed at the top and bottom of each post. There are numerous WordPress plugins that can help, just be cautious because some plugins may conflict with ones you already have on your site. Look for plugins that have reviews and recommendations from trusted sources, and that provide support if needed. 2. Create templates for byline and bio text If there are no byline or bio sections on your blog, you can add these details manually to each post. Use a template that spells out your preferences for font size, formatting, capitalization, length and punctuation of this text. This way every post will have a professional look that’s consistent with your clinic branding. 3. Add each user In your website’s dashboard (administrative settings), create a unique user profile for every team member who will be contributing regularly to the blog. Again, use your templates to give these a consistent look and feel. That way, even if your blog manager is doing the actual posting, he or she can easily assign each post to a specific author. Tip: In WordPress, if you don’t see a place to set the author of each post, look for the Screen Options menu at the top right-hand corner of the post editing screen. This will open your screen options and you can check the box next to “Author.” You can also assign authors with the Quick Edit link on the All Posts page. 4. Plan for guests For external or occasional contributors, create a profile with a name such as “Guest Author.” Add a template for these bios as well, including a guideline for how many links you will include back to the guest author’s own website. 5. Connect with your reader Add a call-to-action (CTA) to each author bio. This might be to read that practitioner’s full About page, book a treatment session via an online contact form or appointment calendar, or read a page about the services she or he provides.